Social automation, screen by screen.
The exact Blotato workflow captured in order — set up your brand, connect Claude over MCP, link your social accounts, generate the AI video, write one post and publish to every platform. Screens shown are a real EatCookJoy run. This is a companion to the DIY Marketing Coach — the coach stays focused on your industry; this page is the deep dive.
The problem it solves
Producing high-quality content consistently, while growing on multiple platforms — without paying for a stack of tools that don't talk to each other.
Blotato is an all-in-one AI content workspace to create, remix and distribute viral posts and faceless videos. One workspace replaces the scattered tools you'd otherwise juggle — and Claude Code drives it over MCP.
Remix across platforms
Turn a YouTube or TikTok video into an Instagram post or an X thread; turn several articles into a YouTube script.
Faceless AI media
Generate high-quality AI images, videos and voices — no camera, no editor needed.
Schedule everywhere
Queue and publish in advance to every connected platform from one place.
Never run out of ideas
Track trending viral posts and pull fresh, on-brand angles on demand.
Set up your brand
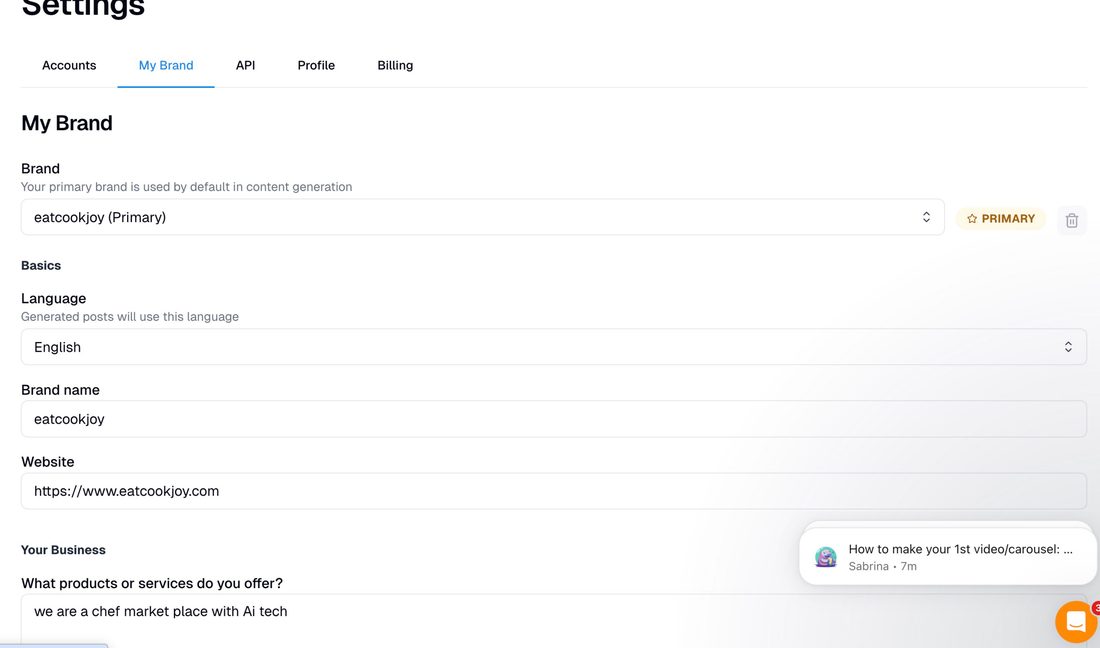
Settings › My Brand
Your primary brand is used by default in every generated post. Set the basics once and Blotato writes in your voice.
- Pick your primary brand and language (English)
- Brand name + website — e.g.
https://www.eatcookjoy.com - This profile feeds the AI's tone for every channel
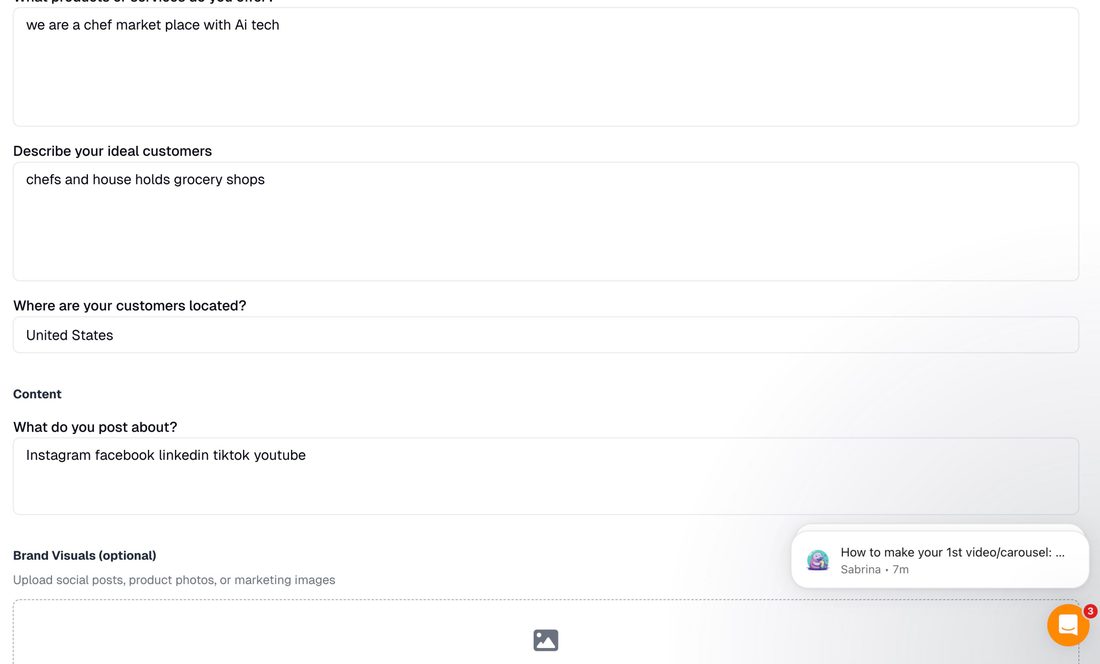
Tell it about your business
The more context you give, the more on-brand the posts. Fill the business + content blocks, then drop in any brand visuals or documents.
- What you offer · your ideal customers · location
- What do you post about? — Instagram, Facebook, LinkedIn, TikTok, YouTube
- Upload brand visuals (≤10MB) & documents (≤25MB) — optional
Connect Claude & your channels
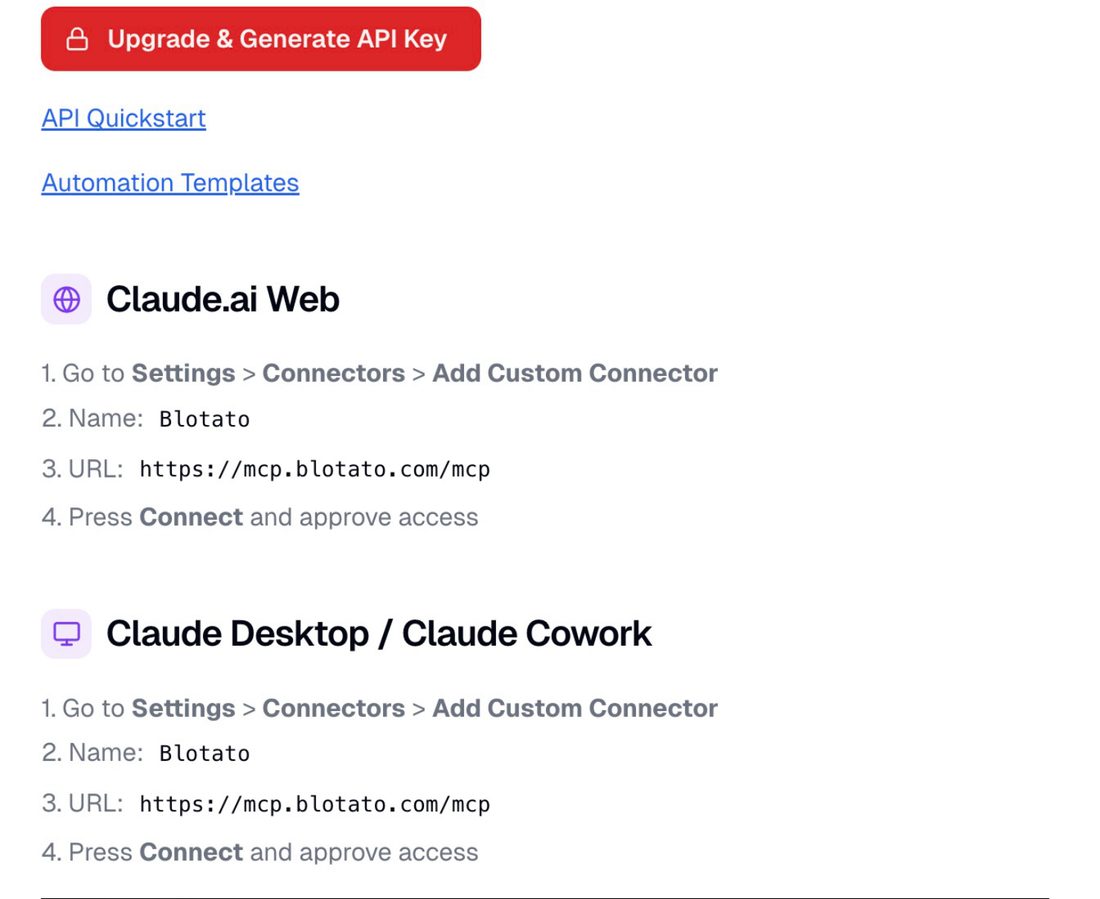
Connect the Blotato MCP to Claude
This is what lets Claude Code drive Blotato — write posts, make visuals and schedule, all from a prompt.
- Press Upgrade & Generate API Key
- In Claude (Web / Desktop / Cowork): Settings › Connectors › Add Custom Connector
- Name:
Blotato· URL:https://mcp.blotato.com/mcp - Press Connect and approve access
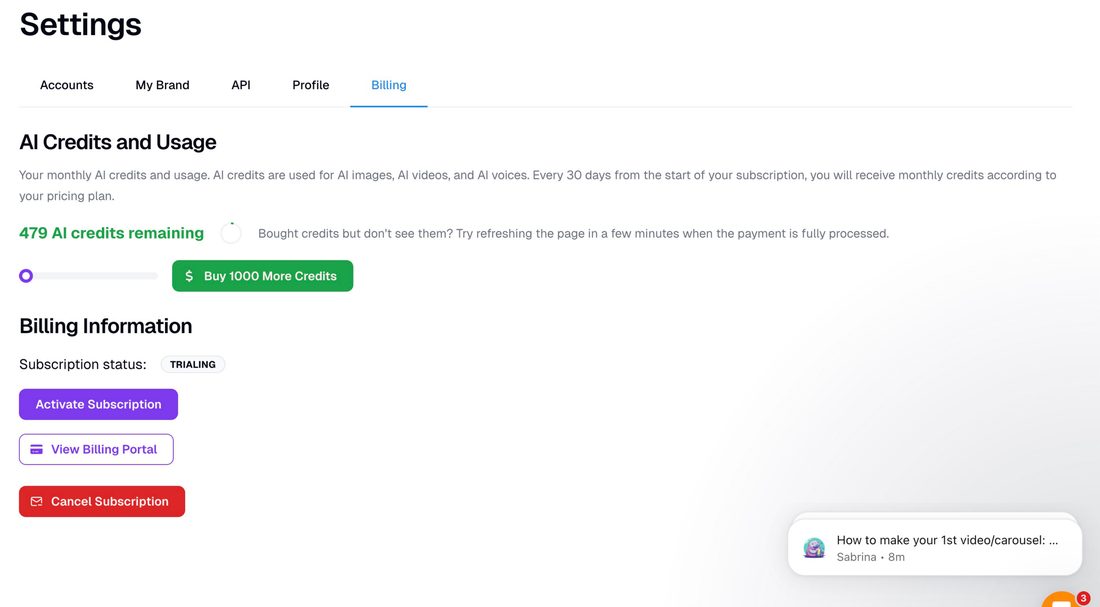
Credits & plan
AI credits power your images, videos and voices — topped up every 30 days on your plan.
- Check AI credits remaining before a big batch
- Buy 1000 More Credits any time
- Activate the subscription to leave trial mode
Connect your social handles — all of them
Settings › Accounts › Add a new account, then log in to each network you want to publish to.
- Twitter/X · LinkedIn · Facebook · TikTok · Instagram
- Threads · Pinterest · Bluesky · YouTube
- Connect every handle in one pass — Blotato fans one post out to all
Generate the video
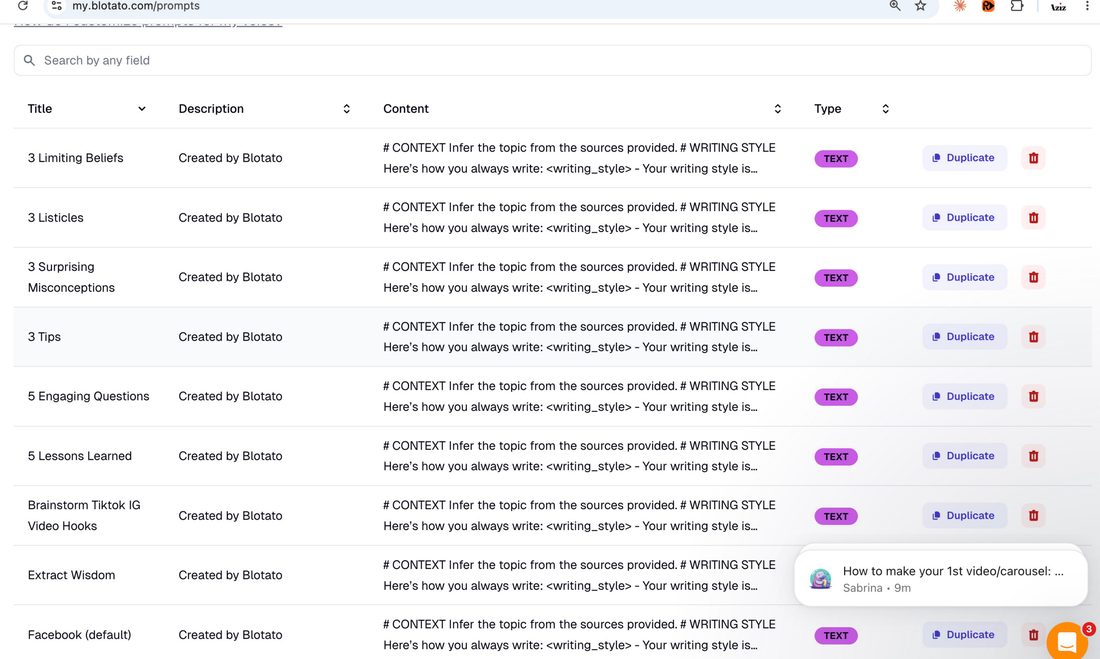
Pick a content angle
Start from a proven prompt template, or write your own. Each defines a writing style the AI follows.
- Listicles · Tips · Engaging Questions · Lessons Learned
- TikTok/IG video hooks · Extract Wisdom · platform defaults
- Duplicate a template and tune it to your brand
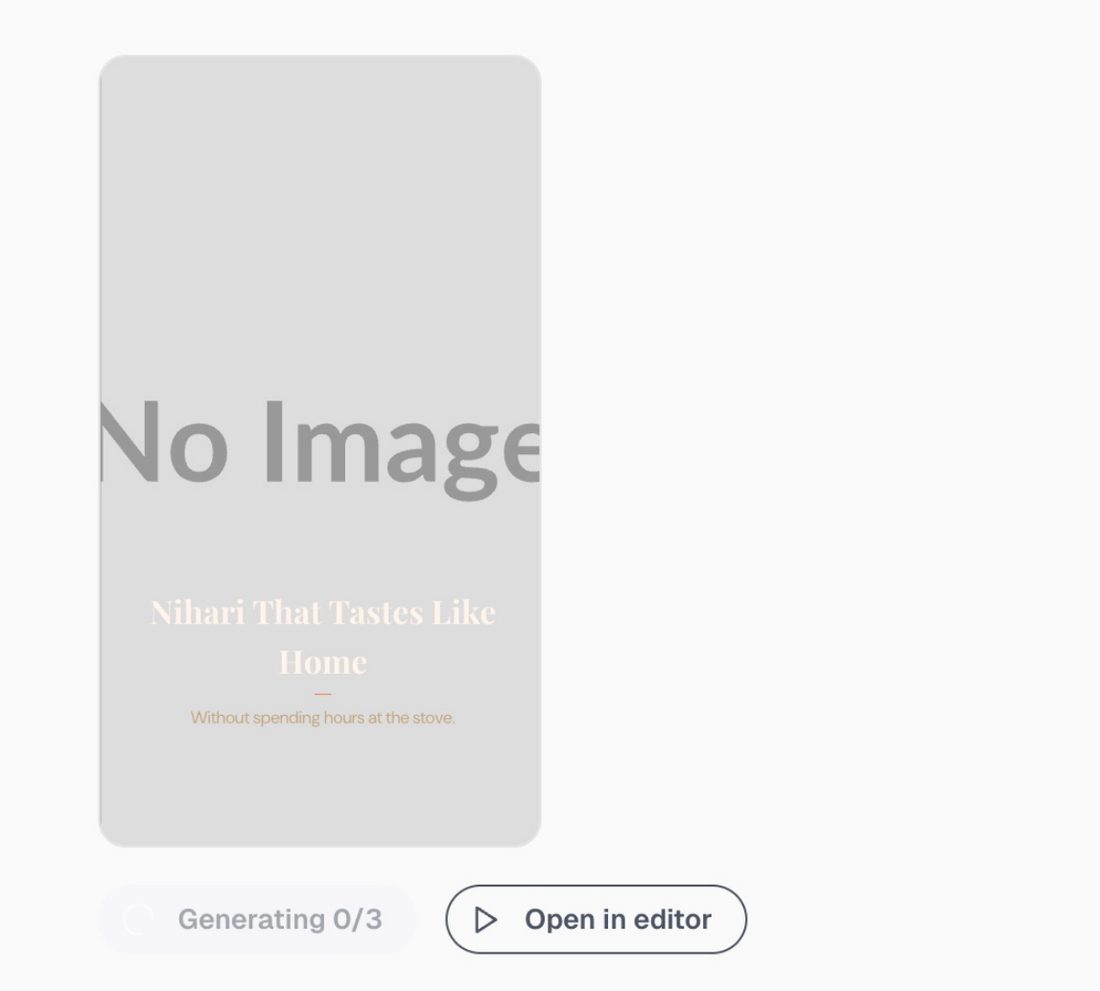
Generate the AI video
Blotato builds the reel slide by slide (here, 3 slides) in 9:16 — each with a headline pulled from your brief.
- Watch the Generating 0/3 progress
- Slide copy, e.g. "Nihari That Tastes Like Home"
- Then Open in editor to refine
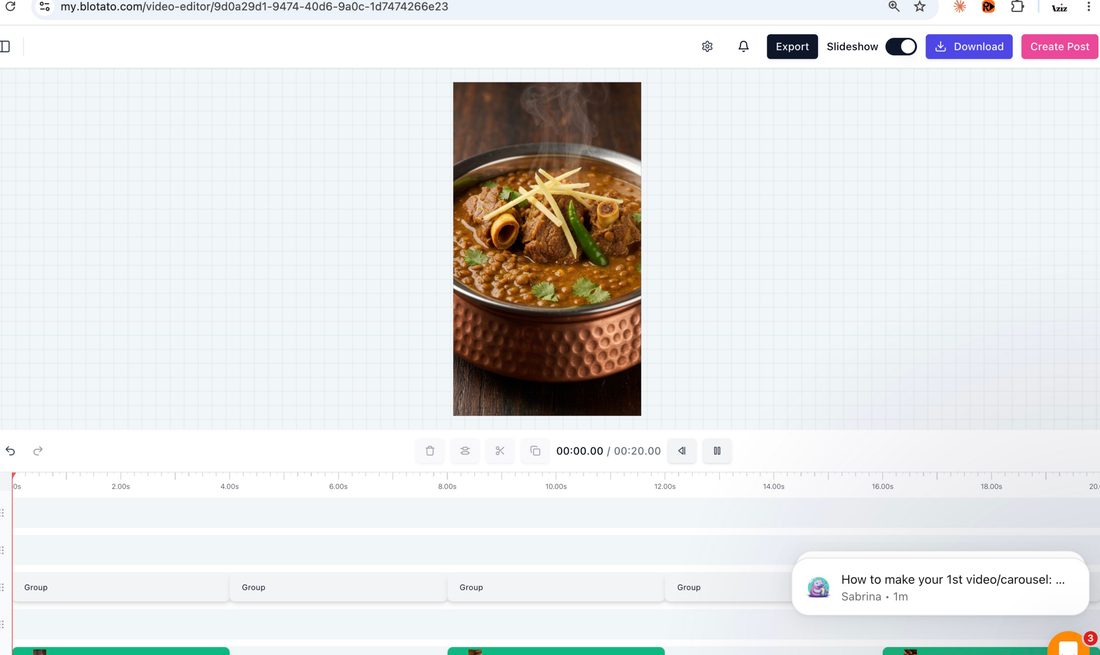
Fine-tune in the editor
The timeline editor is where you trim, swap clips, tweak captions and lock the look before publishing.
- 9:16 preview with a clip + caption timeline
- Export / Download the finished MP4
- Or jump straight to Create Post
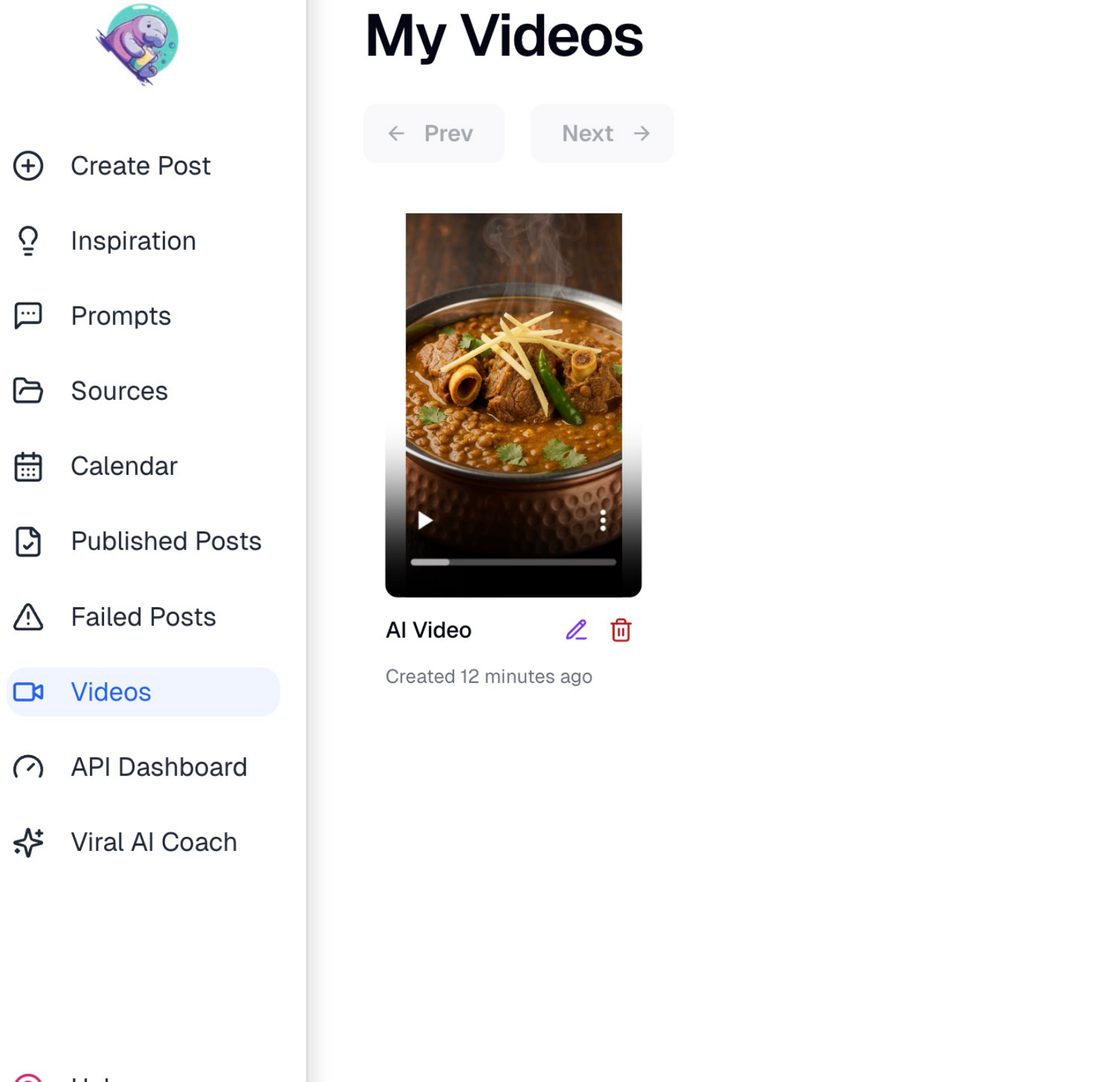
Your video is ready
Finished renders land in Videos › My Videos, ready to edit again or push into a post.
- Preview the AI Video (the nihari reel)
- Edit or delete from the card
- Left rail: Create Post, Inspiration, Prompts, Calendar, Published
Write once, publish everywhere
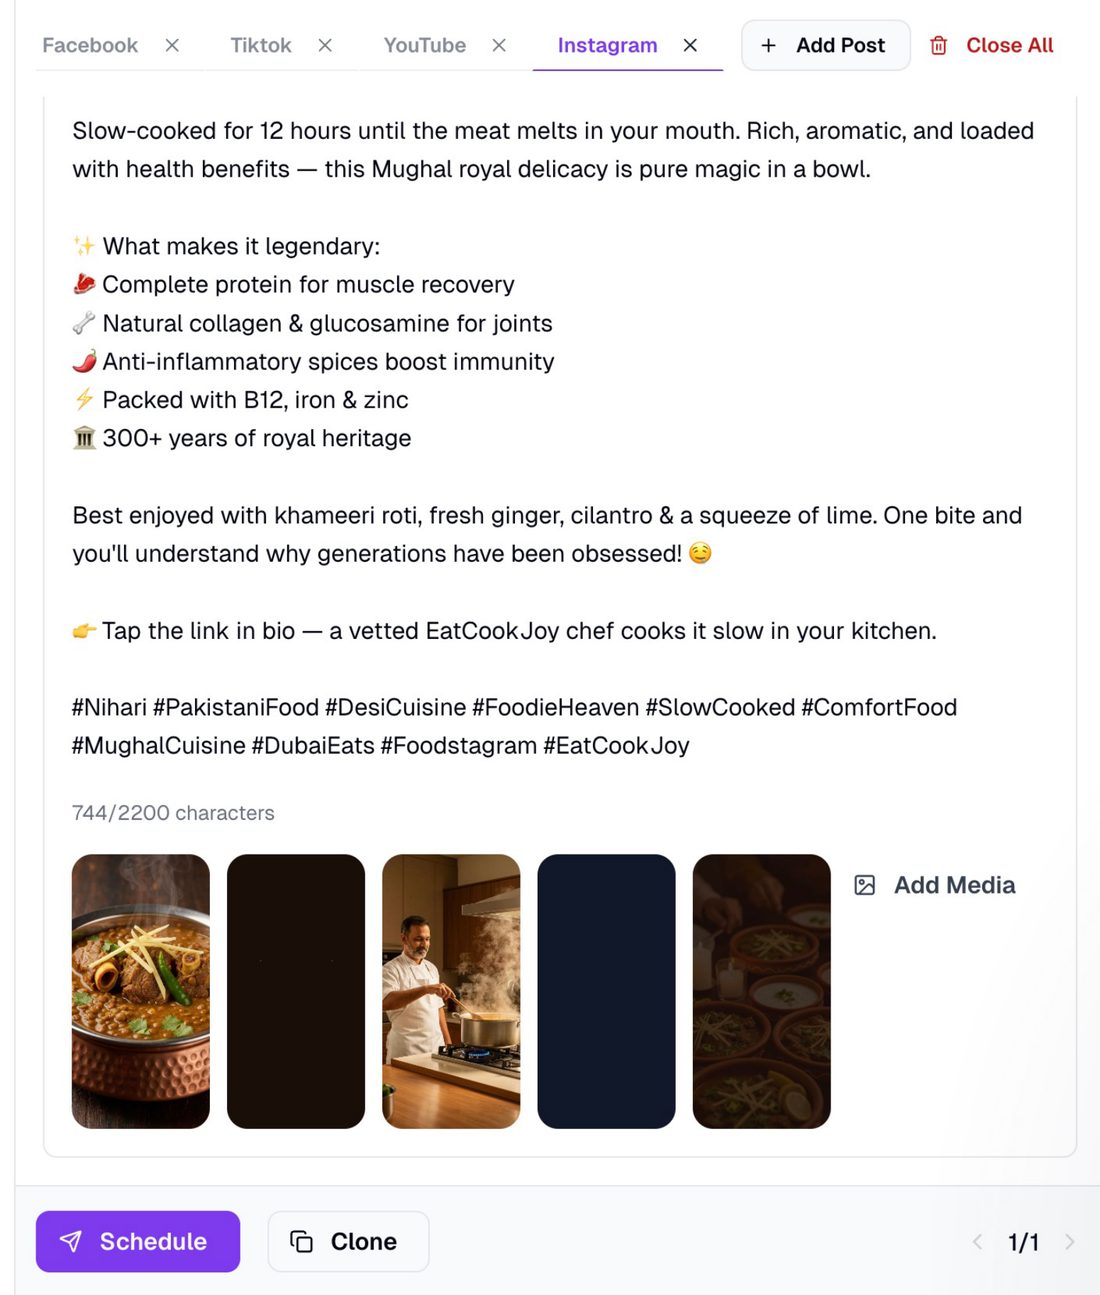
Compose one post for every platform
This is the heart of it: tabs for Facebook · TikTok · YouTube · Instagram across the top, one caption, one media set.
- Write the caption once (here, the EatCookJoy nihari copy)
- Attach the reel(s) + hashtags · live character count
- + Add Post for more channels · Schedule or Clone
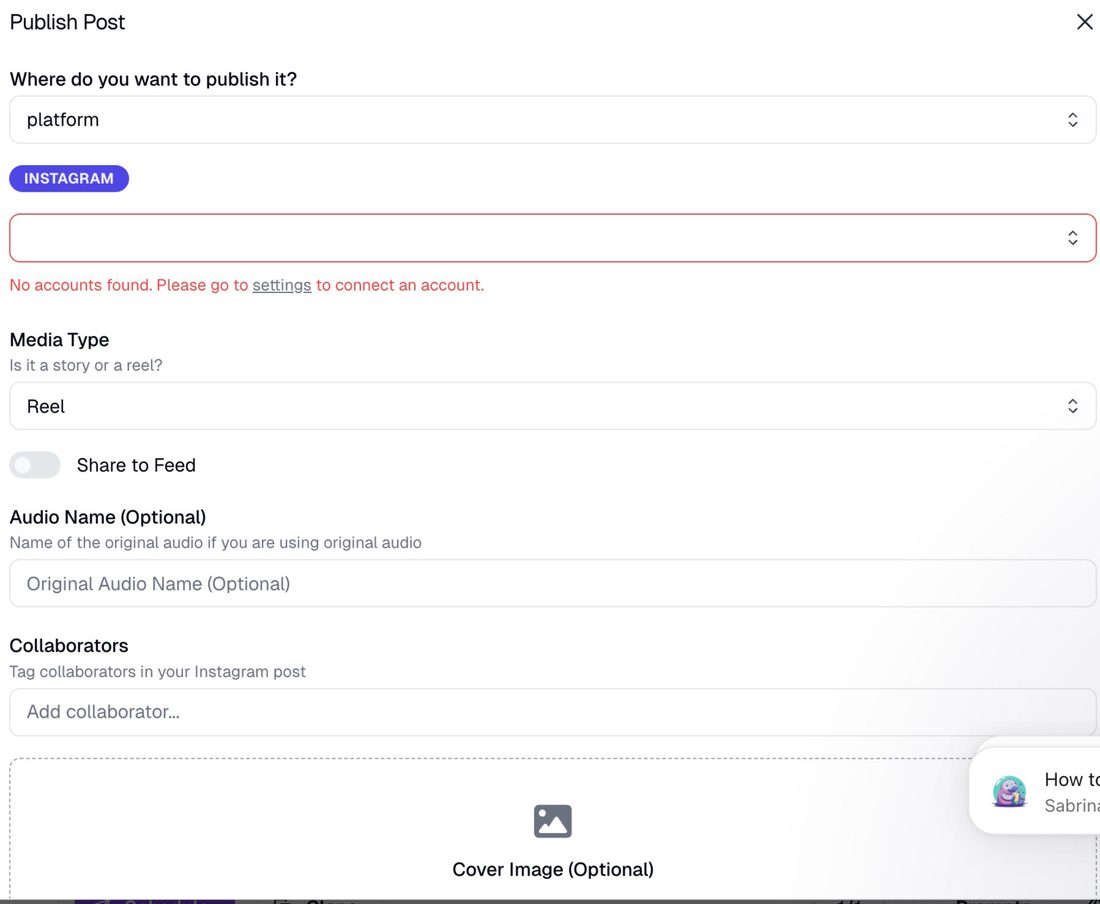
Per-platform publish options
Each tab exposes that network's own settings so the post is native everywhere — no manual reformatting.
- Media Type — Reel or Story · Share to Feed
- Audio name · Collaborators · Cover image
- Blotato renders the correct ratio per network automatically
Schedule, ship & automate
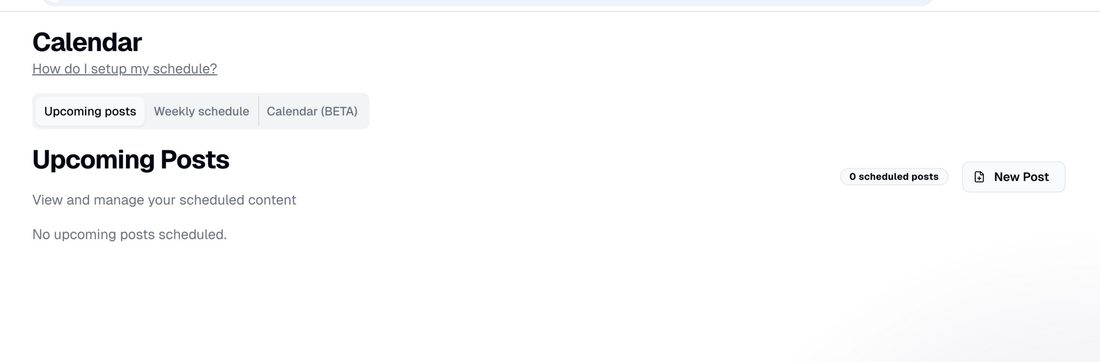
Schedule it
Queue everything at strong local times and let it run. Switch between Upcoming, Weekly schedule and Calendar.
- Upcoming posts · Weekly schedule · Calendar (beta)
- New Post to add to the queue
- Post automatically at peak local times
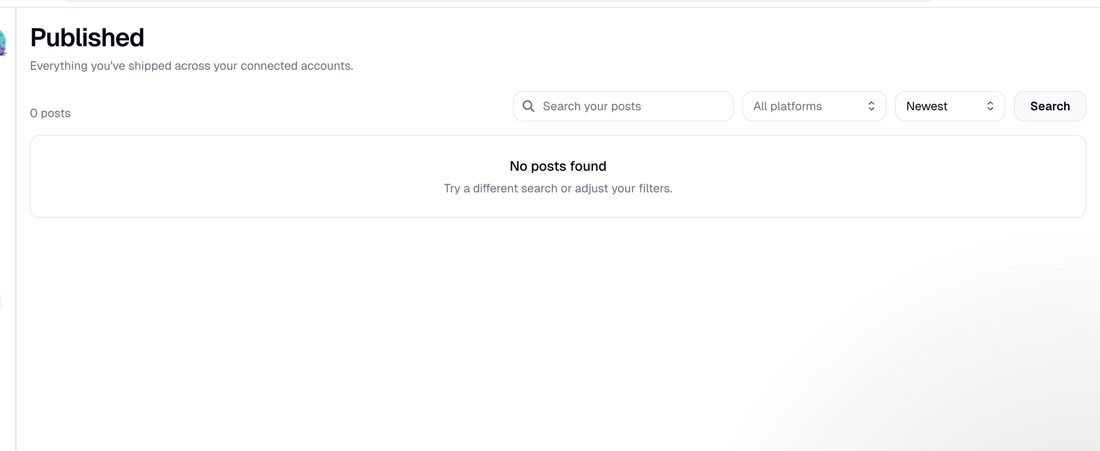
Track what shipped
Everything you've published across connected accounts lives in one place — search and filter by platform.
- Filter by platform · sort by newest
- Pair with Failed Posts to retry anything that bounced
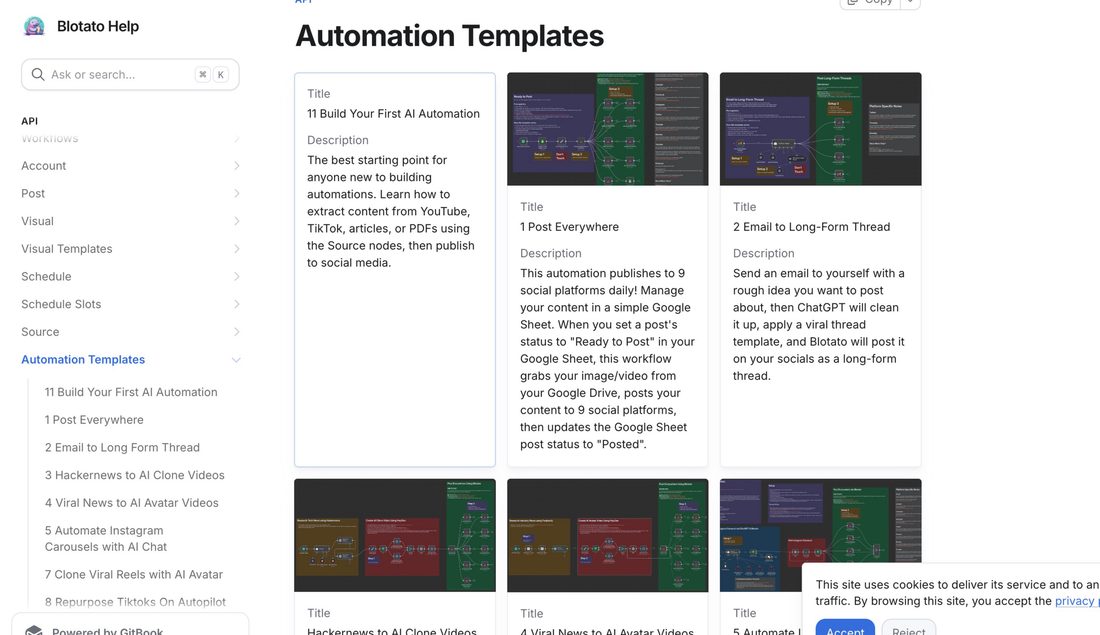
Automate the whole loop
Once the manual flow makes sense, wire it to Claude Code with a ready-made automation template and run it on a prompt.
- Build Your First AI Automation · Post Everywhere
- Extend to Long-Form Thread · AI Avatar / Clone videos
- One prompt → research, write, render, schedule
Skip the blank page — drop these into Blotato
Three live brands, each with a 30-day posting calendar (Blotato-ready CSV), render-ready reel scripts for every hook, and the full bilingual copy pack (EN + native Arabic). Generated with the Content Studio skill from each site's own page.
Import the CSV in Blotato (Calendar → Import / Bulk upload → map the columns → schedule), use the reel scripts to render in Higgsfield / Kling / CapCut, and pull captions straight from the copy pack.
EatCookJoy UAE
Private-chef-at-home · Dubai · Abu Dhabi · Sharjah.
30-day calendar (CSV) · Reel scripts · Copy pack
Aziz Saif · azizsaif.com
Practical AI agents, automation & brand sites.
30-day calendar (CSV) · Reel scripts · Copy pack
Now run it on your own brand
Set your brand, connect the MCP, link your handles — then ask Claude Code to write the week and Blotato ships it everywhere.